You know the struggle. You open your luggage at the hotel, and your once-pristine makeup bag looks like a crime scene. Foundation is smeared across your eyeshadow palette, powder is dusting everything in sight, and your mascara wand is somehow sticking to your passport. Your makeup survived the trip, but your sanity is hanging by a thread.
This chaos isn’t just annoying—it costs you time and money when products break or become unusable. The problem is that most travelers treat their makeup bag like a simple sack, tossing items in without a system. The solution lies in how you organize, pack, and choose the right travel makeup bags for cosmetics that match your specific routine. Today, we’re fixing this mess permanently with actionable strategies that survive even the roughest baggage handling.
What Makes a Makeup Bag Actually Travel-Ready?
A travel-ready makeup bag is not just a cute pouch. It is a structured system designed to protect products, prevent leaks, and organize items by function. The best bags feature durable, wipeable materials, multiple compartments, and secure closures that withstand pressure changes during flights.
Key Features to Look For
Look for bags with padded interiors to protect fragile items. Waterproof or water-resistant exteriors prevent damage to your clothing if a bottle bursts. Transparent compartments help you find items quickly without digging. Zippers should be sturdy and smooth-gliding, not flimsy or prone to snagging.
Why Size and Shape Matter
Rectangular bags pack more efficiently than round ones. Hard-shell cases offer maximum protection but take up space. Soft-sided bags are flexible and easier to squeeze into tight suitcase corners but offer less protection. Consider your travel style—carry-on only versus checked luggage—before choosing a size.
Material Considerations
Nylon and polyester are lightweight and quick-drying. Vegan leather looks premium but requires care. Neoprene is flexible and cushioned but can trap moisture. Silicone bags are easy to clean but may not offer enough structure for fragile items. Choose materials that match your durability needs.
Organizational Compartments
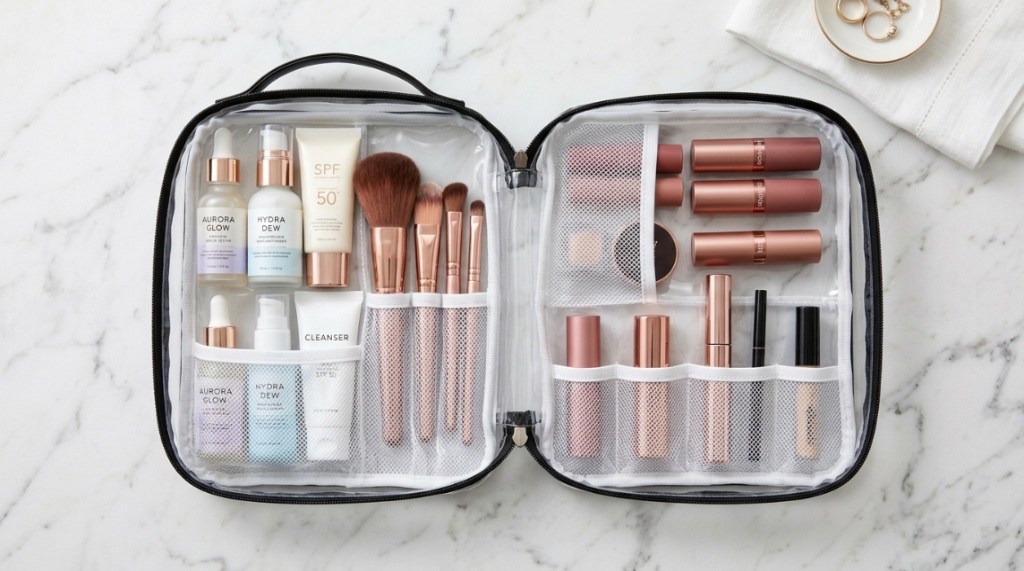
Multiple compartments are essential for keeping liquids separated from powders and tools. Look for bags with adjustable dividers, mesh pockets, and elastic straps. These features prevent items from shifting during transit and mixing together.
Why Do Cosmetics Turn Into a Mess During Travel?
Cosmetics become messes during travel due to three factors: pressure changes, temperature fluctuations, and physical movement. Air pressure drops in airplane cabins cause liquid products to expand and push against their caps. Heat causes formulas to soften, and constant motion breaks powder compacts and bends brush bristles.
The Pressure Problem
When you fly, cabin pressure is lower than ground level. This pressure difference forces air out of cosmetic containers, creating a vacuum effect when you open them later—or pushing product out while sealed. Creams and liquids are most vulnerable to this expansion.
Temperature and Heat Damage
Bags stored in checked luggage endure extreme temperature changes in cargo holds and baggage carts. Lipsticks soften and bend, cream blushes melt and separate, and wax-based products lose their shape entirely. Keeping these items in your carry-on helps maintain a more stable temperature.
Physical Jolting and Movement
Your bag gets tossed, dropped, and squished throughout your journey. Loose items bounce around, causing powders to crack and liquids to leak. Without proper cushioning and separation, your cosmetics are guaranteed to sustain damage before you reach your destination.
How Can You Prevent Liquid Leaks Effectively? 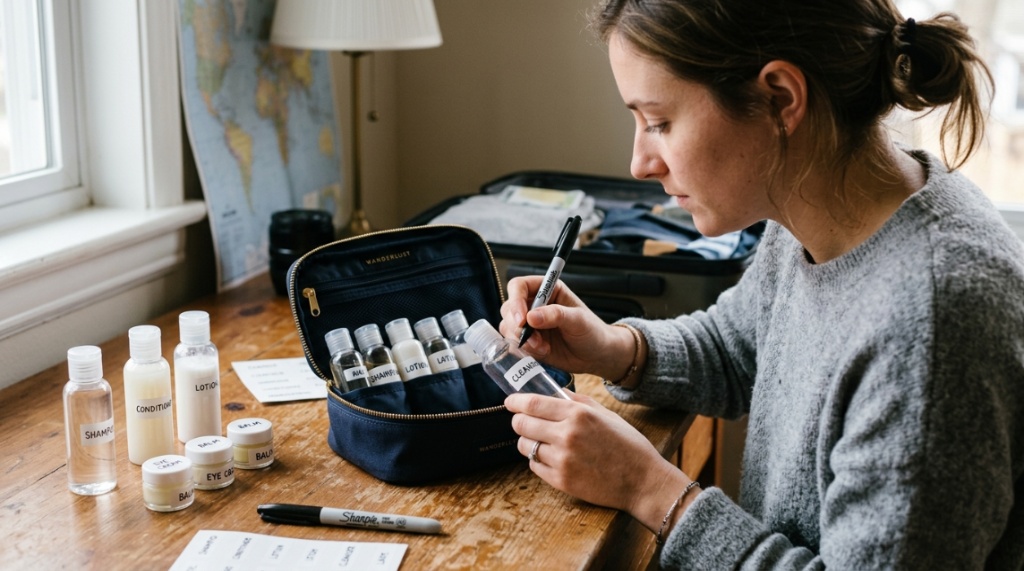
Preventing liquid leaks requires a two-part strategy: securing all container caps before packing and creating a barrier between liquids and the rest of your items. Never assume your product caps are secure without checking them first, even if they are brand new.
Pre-Packing Leak-Proofing Steps
- Remove any safety seals or foil layers that might tamper with cap closure
- Wrap a thin piece of plastic wrap under each cap before closing tightly
- Place all liquid products in a sealed zip-top bag as an extra barrier
- Store liquid bottles upright, never on their sides or upside down
- Fill bottles only three-quarters full to leave room for pressure expansion
Choosing Leak-Proof Containers
Invest in travel-sized versions of your favorite products rather than transferring full-size bottles. Airless pump containers are excellent because they do not rely on gravity for dispensing. Silicone travel bottles squeeze without breaking the seal, making them more reliable than hard plastic options.
The Plastic Wrap Trick Explained
Place a small square of plastic wrap over the opening of a bottle, then screw the cap back on. The wrap creates an extra seal that prevents leaking even if the cap loosens during transit. This simple, cost-effective method works for foundation, toner, and makeup remover bottles.
Which Products Need the Most Protection?
Liquid foundation, nail polish remover, and setting sprays are the most likely to leak. Oil-based products like face oils and makeup removers have thinner consistencies that escape more easily. Treat these items as hazardous materials and give them dedicated, sealed compartments.
Which Cosmetics Should Stay in Your Carry-On?
Keep essential liquids and all fragile powder products in your carry-on bag. The items you need immediately upon arrival—concealer, mascara, setting powder, and lipstick—should never go into checked luggage. Loss prevention and temperature control make this the logical choice for these essentials.
Items for Immediate Use
Pack a small pouch with your everyday essentials for quick touch-ups during layovers. Include blotting papers, pressed powder, lip balm, and eyebrow pencils in this dedicated kit. This ensures you have a functional, presentable appearance available even if your checked bag is delayed.
Liquid Restrictions and TSA Rules
Remember that carry-on liquids must be 3.4 ounces or less per container and fit in one quart-sized clear bag. Travel-sized products are your answer here. Purchase mini versions of your favorite products or use small, refillable containers that meet these requirements.
Flight Delay Surprises to Avoid
Pack a mini emergency kit even for short flights. Include hand cream, lip balm, pressed powder, and mascara in a tiny pouch. You never know when a delay will keep you away from your main bag for five hours or more. This small kit saves you from looking haggard in photos you did not expect to take.
How Should You Organize by Product Type?
Group your cosmetics by category rather than daily routine sequencing. This is the single biggest transformation you can make to your packing process. Separate liquids, powders, creams, and tools into distinct zones within your makeup bag to prevent cross-contamination and damage.
Liquid and Cream Compartment
Designate one compartment exclusively for liquid and cream products. Foundation, concealer, primer, and cream blushes belong here. Keep them upright and secure with elastic straps or place them in small, hard-sided pouches to prevent crushing.
Powder Products Zone
Powders need their own soft, padded area. Pressed eyeshadows, blushes, and setting powders crack easily when bumped against hard objects. Wrap each palette in a soft cloth or place them in individual pouches before placing them in your bag. Stack them flat, never on their side.
Tools and Brushes Separate
Brushes and sponges should never jumble freely with products. They carry oils and pigments that can stain other items, and their shapes get warped in transit. Use a dedicated brush roll or holder that keeps bristles protected and separates them from everything else.
Small Items Nobody Thinks About
Lash curlers, tweezers, eyelash glue, and pencil sharpeners need their own small compartment. These items have sharp edges that puncture other packaging. Consider a small, dedicated pouch for all tools and accessories that is easy to find inside your larger bag.
When Should You Downsize Your Cosmetics Kit?
Downsize your cosmetics kit when your trip is shorter than five days, when traveling with only a carry-on, or when your destination offers easy access to stores for restocking. Long trips do not require you to bring your entire collection—they require strategic planning.
The Five-Day Rule
For trips under five days, you can realistically get by with a streamlined routine of essential products only. Pack one foundation, one concealer, one eyeshadow palette, one blush, one mascara, and two lip products. This simplifies your bag and dramatically reduces mess potential.
Multi-Purpose Product Strategies
Choose products that serve multiple functions to minimize quantity. Use a cream blush as a lip tint, eyeshadow as a brow powder, and tinted moisturizer instead of separate foundation and moisturizer. This reduces volume and weight while maintaining your routine.
Sample Sizes and Sachets
Collect sample sizes and sachets of your favorite products for travel use. Department stores and beauty subscriptions often provide generous trial sizes that are perfect for trips. These take up minimal space and are disposable, so you lose nothing if they are damaged.
Assessing Your Actual Needs
Be honest about what you actually use daily versus what you only occasionally reach for. The basic black eyeliner you never wear in real life will not suddenly become your go-to during vacation. Pack only items with proven daily use habits and revisit this every single trip.
Can You Pack Makeup Without Damaging Products?
Yes, you can pack makeup without causing damage by using cushioning materials, strategic placement, and proper product preparation. The key is thinking like a fragile items shipper, not like a person throwing items into a bag. Every item deserves intentional placement.
Use Soft Materials as Buffers
Socks, underwear, and scarves make excellent buffer materials for protecting fragile cosmetics. Wrap palettes in a clean sock or fold a scarf around glass bottles. This repurposes existing clothing as protective packaging and adds almost no extra weight to your luggage.
Fill Empty Spaces to Prevent Shifting
Empty spaces within your makeup bag allow items to slide around and collide. Fill gaps with cotton rounds, cotton swabs, or small pouches of accessories. This prevents movement and creates a snug, padded environment where nothing can shift during transit.
Wrap Fragile Palettes Securely
Use a thin layer of bubble wrap or even paper towels to wrap individual palettes. Place them flat at the bottom of your bag, where they are least likely to be squeezed or bumped. Stack no more than two wrap-covered palettes together to reduce pressure.
How Do You Pack Liquid Foundation Without Spills?
Pack liquid foundation by first removing the pump or cap, covering the opening with plastic wrap, and replacing the closure tightly. Then store the bottle upright in a sealed, waterproof pouch placed in the deepest part of your bag where pressure is least likely to force leakage.
Which Foundation Container Types Are Safest?
Pump bottles are generally safer than open-neck bottles because they create a tighter seal, but you still need to secure them properly. Tubes with flip-top caps are reliable. In contrast, glass jars with wide openings are the highest risk for leakage and should be avoided for travel.
Transfer Your Foundation for Better Safety
Transferring your foundation into a small, durable travel bottle is the best protective measure you can take. Decant only what you need for the trip. This protects your full-size bottle and ensures a leak-proof, lightweight travel container with less air pressure risk.
Testing Your Foundation Before You Go
Test your foundation bag before you leave by squeezing the pouch gently to check for escaping liquid. Do a ten-second inverted test to see if any product escapes from the mouth of the bottle. Do not wait until you arrive to discover that your foundation is now a shirt stain.
What Packing Order Prevents Chaos?
Follow a specific packing order to prevent chaos: heavy items at the bottom, then liquids, then powders, then tools on top. This gravity-based approach keeps weight concentrated and stable while protecting the most fragile items from being crushed by heavier objects.
The Bottom Layer
Your bottom layer contains the heaviest, most durable items. Full-size cream products, large mirrored compacts, and pencil cases go here. These items provide a stable base that prevents lighter, fragile items from shifting or being crushed. The foundation of your bag matters.
The Middle Liquid Layer
Place all sealed liquid bottles and tubes in the middle layer, where they are surrounded and cushioned by softer items. Keep them upright and support them with clothing or soft pouches on either side. This prevents both leakage and breakage from impacts.
Powder and Palette Placement
Powder compacts and eyeshadow palettes occupy the next level, wrapped in soft cloth and placed flat. Never stack powders directly on top of liquids, as any condensation or leak will ruin them instantly. Each palette should have a soft layer between itself and other items.
The Top Accessory Zone
Brushes, applicators, and small tools go at the very top. This protects their shape and keeps them clean from any products below. Use a brush roll or wrap brushes in a scarf to keep bristles together and deliver maximum protection without taking up too much space.
How Do You Choose a Bag with Good Compartments?
Choose a bag with compartments you can actually use, not just ones that look good in photos. Look for a mix of large zones for bigger items and small slots for brushes and pencils. The best bags have adjustable features that adapt to whatever you are packing each trip.
Fixed Versus Adjustable Compartments
Fixed compartments are great for organizing small, similarly sized items like lipsticks and liners. Adjustable dividers give you superior flexibility for different trip types, letting you customize spacing for jumbo palettes or bulkier bottles. Your packing needs change with every destination, so a flexible interior wins every time.
Transparent Versus Opaque Options
Transparent compartments let you see exactly what is inside without unzipping, which helps you grab essentials quickly. Opaque compartments are more attractive and keep items out of view. The best solution is a transparent window panel with a protective cover for style and speed.
When packing your daily essentials, curate your color palette wisely based on your current aesthetic—especially if you want to master the coquette makeup style with soft pinks, ribbons, and glowing highlighters before packing them securely into your travel compartments.
What is the best way to secure small items?
Small items like bobby pins, lash curlers, and lip pencils need dedicated slots. An organizer with elastic straps or mesh pockets is the best way to secure these tiny essentials. These features keep items visible and accessible, with less digging through the main space.
Why Do Some Bags Damage Your Makeup?
Some bags damage your makeup because they lack internal structure, allowing items to collide freely, or they are made of materials that transfer heat or moisture. Cheap bags with thin interiors do not offer enough shock absorption to protect powder compacts and glass bottles.
Bags Without Internal Dividers
An empty, unstructured bag forces all products to rub against each other. When you toss this bag into luggage, your eyeshadow palette becomes a victim of your shampoo bottle. The lack of separators is the absolute top cause of product damage in transit.
The Problem with Overly Soft Materials
Very soft bags made of thin fabric do not protect items from external pressure. Squeezing the bag to fit your suitcase compresses everything inside, breaking powders and cracking creams. You need some reinforced structure within the bag to prevent this crushing impact.
Heat Transfer from Dark Colors
Dark-colored bags absorb more heat than light-colored ones, increasing the temperature inside the bag on sunny days. This is especially harmful to lipsticks and cream products. Choose light or metallic materials for makeup bags destined for warm climates to mitigate this.
How Can You Establish a Reusable Packing System?
Establish a reusable packing system by creating a travel prep station and keeping your travel bag stocked with the non-liquid essentials. This reduces your pre-trip stress and ensures you never forget those small items that are difficult to find last minute in your daily routine.
Create a Travel Stash
Designate a dedicated basket or drawer for travel-sized products that you refill after each trip. Include separate baskets for liquid, powder, and tool categories. This keeps your regular collection untouched and your travel items always ready, eliminating last-second packing panic entirely.
Maintain a Packing Checklist
Create a simple checklist on your phone that you review before every departure. List every product category and check them off as you transfer them into your bag. This prevents leaving behind essentials, which promotes hasty shopping at overpriced destinations or doing without.
Inspire a Post-Trip Reset Routine
Take thirty minutes after each trip to clean and reset your travel bag as soon as possible. Discard empty containers, wipe out spills, and return unused trial sizes to your travel stash. This keeps your system working and minimizes the amount of pre-trip work later on.
Evolving Your System Over Time
Do not be afraid to change your setup as you learn what works for you. A product you rely on now may not be necessary next year. Revise your system on a regular basis to accommodate your changing routine, your travel frequency, and any new product introduction.
Frequently Asked Questions
Can I bring a makeup bag in addition to a carry-on bag?
Yes, you can bring a makeup bag in addition to your carry-on if you have a personal item allowance, like a purse or backpack. Most airlines allow one personal item plus one carry-on. Your makeup bag typically counts as your personal item, as long as it fits under the seat in front of you.
How do you get foundation out of a cracked container?
Transfer the foundation to a clean, empty container immediately. Use a small spatula or butter knife to scrape out as much product as possible. Store the new container upright and sealed until you can decant it into your usual packaging at home.
Is it better to buy travel-sized makeup or use your full-size products?
Travel-sized makeup is better for short trips because it is lighter, reduces leak risk, and complies with airline liquid restrictions. For longer trips or products you use heavily, consider decanting full-size products into small, sturdy containers to avoid packing bulky bottles.
What is the one thing you should never pack in a checked bag?
You should never pack nail polish in a checked bag. Nail polish is extremely flammable due to its solvent content, and airlines strictly prohibit it. The pressure changes and temperature fluctuations can also cause the bottles to expand and leak, ruining your clothing and other belongings.
Do mesh bags help prevent makeup messes?
Mesh bags help prevent messes by allowing you to see contents at a glance and by improving airflow. This is great for brushes and sponges which need to dry, but they offer no protection against impact or leaks for bottles and palettes. They are best used for organizing within a larger, structured bag.
How often should you replace your travel makeup bag?
Replace your travel makeup bag at least once a year or when you notice wear marks, stiff zippers, or splits in the lining. A worn-out bag provides insufficient protection for your cosmetics, which defeats the purpose of owning it. Invest in quality to avoid frequent replacement needs.
Conclusion
Mastering a neat travel makeup routine is not about buying the most expensive bag on the market; it is about creating a mindful system that works for you every single time. We have covered the crucial steps: choosing a structured bag with real compartments, securing your liquids thoroughly, wrapping your fragile powders for safety, and organizing by product category to avoid cross-contamination. The ultimate key is to downsize your kit to only the essentials, pack in a deliberate gravity-based order, and maintain a reusable travel stash that takes the stress out of your departure day.
When you adopt this smarter approach, you transform from a frantic traveler battling liquid spills and cracked palettes into a confident jetsetter who opens their luggage to find a perfectly intact cosmetics collection. Your products stay cleaner, last longer, and are ready for immediate use, whether you are touching down in a new city or just stepping into a hotel bathroom. So start fresh before your next adventure by organizing your travel makeup kit with intention, and you will wonder how you ever traveled without a system that keeps your beauty essentials perfectly in place.