
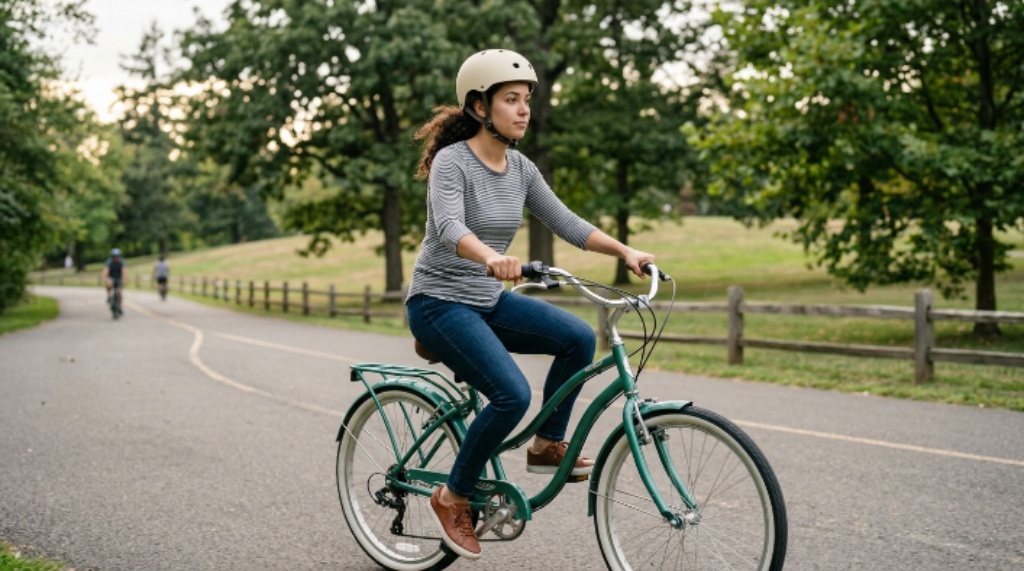
Riding a cruiser bike comfortably starts with relaxed posture, steady balance, gentle braking, and deliberate control. Most riders can improve comfort by adjusting three areas: saddle height, handlebar position, and riding technique. Keep a slight knee bend of about 25 to 35 degrees when the pedal reaches its lowest point. Also, keep your eyes about 15 to 20 feet ahead while maintaining a light grip.
Start With a Comfortable Bike Setup
Comfort begins before the wheels move because poor setup creates tension during every ride. A cruiser should support your natural riding position instead of forcing your body into an awkward shape. Check the saddle, handlebars, pedals, tires, and controls before focusing on technique.
Set the Saddle Height Correctly
Start with the saddle at a height that lets your leg extend without locking your knee. Place one heel on the lower pedal and sit normally to check the position. Your leg should become nearly straight when your heel reaches the lowest point. Then return your foot to the ball of your foot and test several pedal rotations.
A saddle that sits too low can crowd your knees and increase muscular effort. Meanwhile, excessive height can make your hips rock from side to side. Make small adjustments, then ride for two minutes before judging the change.
Position the Handlebars for Natural Reach
Cruiser handlebars often support an upright posture, but comfort still depends on reach. Your shoulders should stay relaxed while your hands rest naturally on the grips. If you stretch toward the bars, move them closer or adjust their height when possible.
Your wrists should remain fairly straight rather than sharply bent upward. Also, keep enough space around the controls for easy brake access. A comfortable reach reduces shoulder tension and gives you finer steering control.
Check the Contact Points
Your body contacts the bicycle through the saddle, pedals, grips, and sometimes the frame. Small pressure problems at these points can become painful during longer rides. Therefore, inspect each contact point before increasing your distance.
Your saddle should support your sit bones without creating sharp pressure. Your shoes should hold the pedals securely without forcing your toes downward. Finally, grips should feel secure without requiring a tight squeeze.
Build a Relaxed Riding Posture
Good posture does not mean sitting perfectly upright like a statue. Instead, it means keeping your body balanced while allowing small movements through your spine and joints. A relaxed body absorbs road vibration better and responds faster to changes.
Keep Your Head and Eyes Up
Look ahead rather than staring directly at your front wheel. Your eyes should identify road changes early enough for you to respond smoothly. Scan farther ahead when you travel faster or approach crowded areas.
Looking forward also helps your bicycle track a straighter line. When riders stare down, they often make unnecessary steering corrections. Consequently, steady vision creates steadier control.
Relax Your Shoulders
Many beginners raise their shoulders when they feel nervous or ride unfamiliar roads. That tension quickly spreads into the neck, arms, and hands. Let your shoulders drop naturally and imagine your arms hanging from your upper body.
Take a slow breath whenever you notice your shoulders tightening. Then loosen your fingers slightly and reset your grip. This simple habit can make a noticeable difference during longer rides.
Keep Your Elbows Soft
Straight elbows transfer every bump directly into your shoulders and upper body. Soft elbows create a small suspension system that helps your body absorb uneven pavement. Keep your elbows slightly bent without deliberately forcing a deep bend.
Your arms should guide the handlebar rather than support your entire body. If your hands carry too much weight, shift your hips and torso into a more balanced position. This adjustment often reduces wrist and shoulder discomfort.
Learn Cruiser Bike Balance
A cruiser feels stable because of its relaxed geometry, but balance still requires active control. The goal involves making small corrections rather than large steering movements. Practice these corrections in a quiet, open area before entering busy traffic.
Practice Starting Smoothly
Place one foot firmly on the ground and position the other foot on a pedal. Push down gently while looking toward your intended path. Once the bicycle moves, bring your second foot onto the opposite pedal.
Avoid staring at the pedal during the start. Instead, learn the movement through repetition and muscle memory. Smooth starts reduce wobbling and help you build confidence quickly.
Keep Your Weight Centered
Your hips should remain centered over the bicycle while your hands provide light steering input. Avoid leaning heavily toward the handlebar when the road feels uncertain. Instead, keep your torso stable and let the bicycle move underneath you.
When you ride slowly, balance becomes more demanding because the bicycle responds more slowly. Therefore, maintain enough momentum for stable steering. Do not force speed, but avoid unnecessary crawling when conditions allow.
Make Small Steering Corrections
Turn the handlebar only as much as necessary to maintain your line. Large steering inputs can create sudden direction changes and make balance harder. Use your eyes to guide your path and your hands to make tiny corrections.
Practice riding in a straight line across an empty parking area. Then practice gentle turns around wide markers. Gradually reduce the turning space as your control improves.
Master Braking Without Losing Comfort
Braking should feel progressive, predictable, and controlled. Squeezing either brake abruptly can shift your weight forward and disturb your balance. Learn to apply pressure smoothly while keeping your body centered.
Use Both Brakes Progressively
Most bicycles use separate controls for the front and rear brakes. Both brakes can contribute to controlled stopping when you apply them smoothly. Start with gentle pressure and increase it as the bicycle slows.
The front brake can provide strong stopping power, but sudden pressure can move your weight forward. The rear brake can help stabilize the bicycle during normal slowing. Learn how your specific bicycle responds before riding in demanding conditions.
Prepare Before You Need to Stop
Move your fingers toward the brake levers before entering areas that require frequent stopping. This preparation shortens your reaction time without forcing you to grip constantly. Keep your eyes active so you can predict hazards early.
Begin slowing before intersections, crowded paths, sharp turns, and downhill sections. Early braking creates more room for controlled decisions. It also prevents the sudden panic that often causes harsh braking.
Brake Before Tight Turns
Reduce your speed before entering a tight corner instead of braking heavily during the turn. Excessive braking while turning can reduce stability and make your line unpredictable. Enter the corner at a manageable speed and maintain smooth steering.
Look through the turn toward the exit rather than focusing on the curb. Your bicycle tends to follow the direction of your visual focus. Therefore, good vision and controlled speed work together.
Improve Steering and Control
Comfort depends on more than posture because every movement affects the bicycle. Smooth control comes from coordinating your eyes, hands, hips, pedals, and braking. Practice each skill separately before combining them.
Use a Light Grip
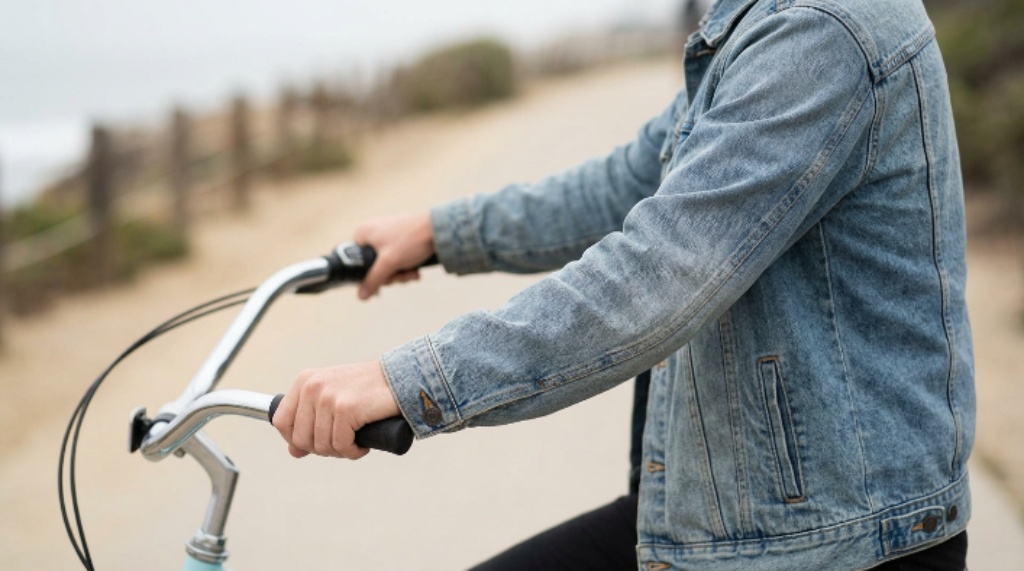
Grip the handlebars firmly enough to maintain control, but avoid squeezing them continuously. A tight grip increases forearm fatigue and makes steering corrections less subtle. Relax your fingers whenever the road remains predictable.
Keep your brake fingers ready when conditions require extra caution. Otherwise, allow your hands to stay comfortable and flexible. This approach preserves control without creating unnecessary tension.
Turn With Your Whole Body
Your hands initiate steering, but your body also influences how the bicycle responds. Keep your torso relaxed and allow your hips to follow gentle turns. Avoid twisting your shoulders aggressively against the bicycle.
For wider cruiser turns, look toward the intended exit and maintain steady pressure. This method keeps your movement smooth and predictable. With practice, turns will require less conscious effort.
Control Your Speed on Descents
Downhill sections demand earlier decisions because your speed can increase quickly. Before descending, confirm that both brakes work properly and keep your eyes focused ahead. Reduce speed before the slope becomes difficult to manage.
Keep your weight centered rather than leaning excessively toward the front wheel. Use controlled braking instead of continuous hard pressure. If the descent feels beyond your skill level, slow down or stop safely.
Ride Comfortably Over Different Surfaces
Cruiser bikes handle smooth pavement well, but real roads include cracks, gravel, drainage covers, and uneven sections. Your technique should adapt before the wheels reach these changes. Early adjustments usually feel smoother than sudden reactions.
Cross Small Bumps Smoothly
Relax your arms and avoid locking your elbows when approaching a rough patch. Reduce speed slightly and keep your line straight when possible. Let your arms and legs absorb some movement instead of fighting the bicycle.
Avoid sudden steering over bumps because the front wheel can deflect unexpectedly. Keep your hands steady and allow the bicycle to pass over the surface. Afterward, resume your normal pace gradually.
Handle Gravel With Care
Loose gravel reduces tire grip and can make steering feel vague. Slow down before reaching the loose surface and avoid sharp turns. Keep your movements smooth until you return to firmer pavement.
Do not brake suddenly while turning across gravel. Instead, straighten the bicycle as much as conditions allow before applying stronger braking. This technique reduces unnecessary sliding and steering instability.
Adjust for Wet Roads
Wet pavement can reduce traction and increase stopping distance. Slow down earlier and avoid abrupt braking or steering movements. Give yourself extra space around vehicles, pedestrians, and other cyclists.
Painted road markings, metal covers, and leaves can become especially slippery when wet. Cross these surfaces with the bicycle as upright as possible. Maintain a steady line and avoid sudden acceleration.
Build Better Control Through Practice
Comfort improves faster when practice targets specific skills instead of simply adding distance. Short sessions can develop better habits without creating fatigue. Use a quiet area where you can repeat movements safely.
Try this simple practice sequence:
- Start and stop smoothly five times.
- Ride straight for 30 to 60 seconds.
- Make five wide turns in each direction.
- Practice progressive braking from a moderate speed.
- Ride slowly for 20 to 30 seconds without wobbling.
- Repeat the sequence while keeping your shoulders relaxed.
After each drill, identify one movement that felt difficult. Then repeat that movement instead of adding more complexity. Focused repetition builds reliable control faster than unfocused riding.
Prevent Common Cruiser Riding Problems
Many comfort problems come from small technique errors rather than the bicycle itself. Recognizing these mistakes helps you correct them before they become habits. Pay attention to what your body tells you during each ride.
Avoid Sitting Too Rigidly
A rigid posture may feel controlled, but it limits your ability to absorb movement. Keep your spine naturally aligned and allow your joints to move. A relaxed position supports both comfort and steering accuracy.
Avoid Oversteering
New riders sometimes turn the handlebar too much when they feel unstable. Large corrections can create the instability they were trying to fix. Instead, look farther ahead and make smaller steering inputs.
Avoid Riding Beyond Your Control
Comfort should never encourage you to ignore road conditions or personal limits. Reduce speed when visibility, traffic, weather, or surface quality changes. Stop when you cannot maintain safe control.
Avoid Ignoring Equipment Problems
Persistent discomfort can signal an incorrect setup or a mechanical problem. Check saddle position, tire pressure, brake operation, and handlebar alignment regularly. Address unusual noises, loose parts, or weak braking before continuing a ride.
Make Longer Rides More Comfortable
Longer rides require more than a comfortable bicycle because fatigue changes your technique. As your muscles tire, you may grip the bars harder and lose posture. Planned breaks can prevent small problems from becoming major discomfort.
Change your hand position occasionally when the handlebar design allows it safely. Stand briefly on the pedals when appropriate to relieve saddle pressure. Drink water regularly and eat according to the length and intensity of your ride.
Wear clothing that allows free movement without bunching around your waist or knees. Use properly fitting footwear that keeps your feet stable on the pedals. Also, consider padded cycling shorts if saddle pressure remains uncomfortable.
A Simple Pre Ride Comfort Check
A quick check can prevent many problems before they begin. Perform it every time you ride, especially after transporting or adjusting the bicycle. The process takes less than two minutes when you build the habit.
Check these points:
- Confirm that the saddle feels secure.
- Check that the handlebars remain aligned.
- Test both brake levers before moving.
- Inspect the tires for obvious damage.
- Confirm that your shoes sit securely on the pedals.
- Set your riding position before entering traffic.
After the check, take a few easy pedal strokes before increasing speed. Notice your shoulders, hands, hips, and knees. If something feels wrong, stop and correct it before continuing.
How to Know Your Technique Is Improving
Better riding often feels quieter rather than more dramatic. You should notice fewer sudden steering corrections and less tension in your shoulders. Your braking should also become smoother and easier to predict.
Another sign involves attention. As your basic control improves, you can focus more on traffic, road surfaces, and other riders. That shift shows that your riding skills require less conscious effort.
Track comfort after rides instead of judging everything during one session. Note where you felt pressure, fatigue, tension, or instability. Use those observations to make one adjustment before your next ride.
Frequently Asked Questions
How should I sit on a cruiser bike?
Sit with your hips centered, shoulders relaxed, elbows slightly bent, and eyes looking forward.
Why does my cruiser bike feel uncomfortable?
Incorrect saddle height, excessive reach, poor tire pressure, or tense riding posture can cause discomfort.
How do I brake smoothly on a cruiser bike?
Apply both brakes progressively while keeping your body centered and reducing speed before turns.
How can I improve balance on a cruiser bike?
Practice slow starts, straight riding, wide turns, and gentle braking in a quiet open area.
Should I ride a cruiser bike upright?
Yes, an upright position suits cruiser geometry, but keep your spine relaxed rather than rigid.
Conclusion
Comfortable cruiser riding comes from alignment, balance, smooth braking, and relaxed control. Start with your bike setup, then practice posture and handling before increasing distance. Most importantly, ride at a speed that lets you respond calmly to changing conditions.
Use the drills in this guide during your next short ride and focus on one skill at a time. With consistent practice, your cruiser can feel more natural, stable, and comfortable across everyday routes.